Importing & Exporting
Bring data in from spreadsheets, other systems, or contact files — and get it back out as CSV or JSON. Imports are guided, resumable jobs: you can load a file today, finish the column mapping tomorrow, and nothing is written to your real data until you press Start import.
Two ways to start an import
- From a table — open a list (for example Contacts) and press Import in the toolbar. The wizard opens with that table already chosen as the target.
- From the Import page — open Import in Settings and press New import. Pick the table under Into table and give the import a name (Name this import).
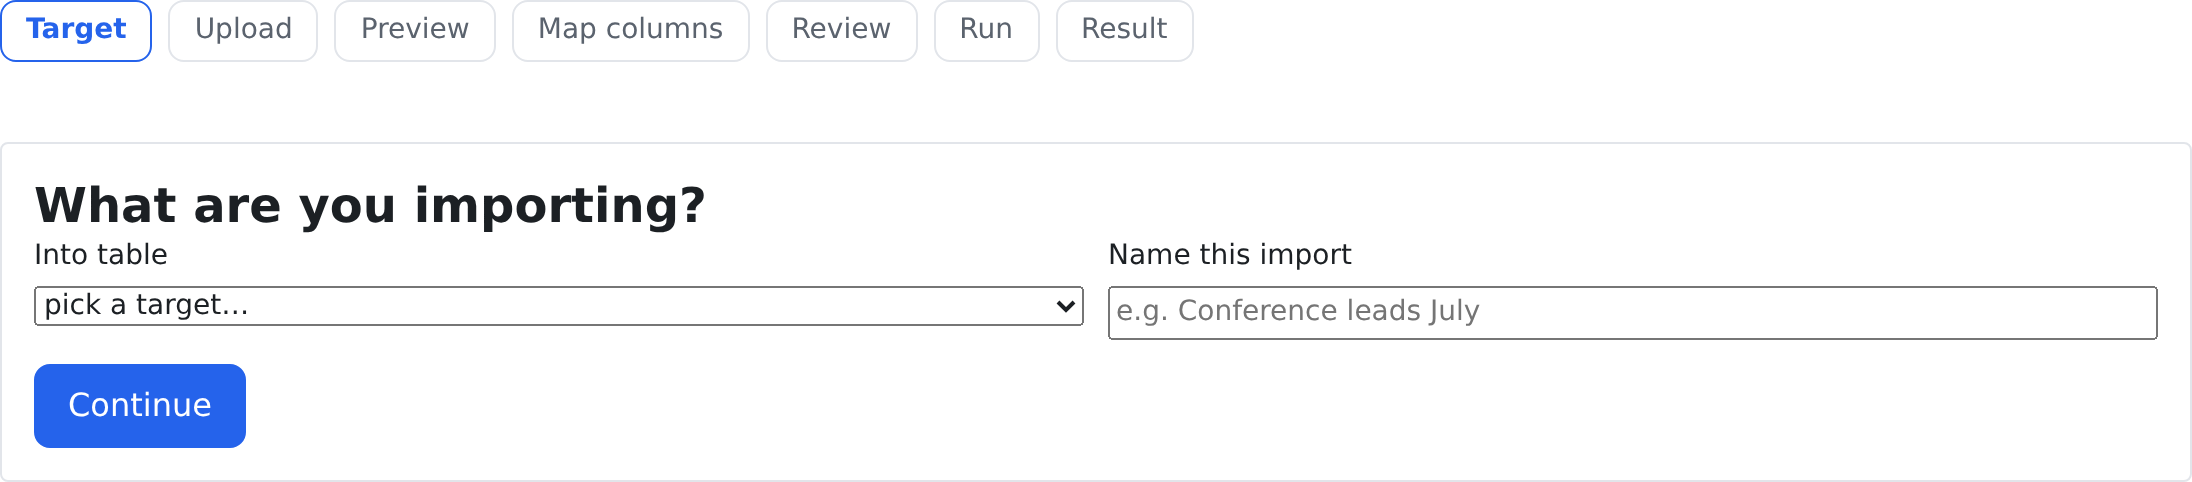
Each import fills one table. The wizard walks through Target, Upload, Preview, Map columns, Review, Run and Result.
wizard only offers those tables. If it is missing, ask your administrator — see
Who Can See What.
What you can import
| Format | What the system reads |
|---|---|
| CSV / TSV | Delimited text. Tick First row is column names if it has a header row; leave the delimiter blank to detect it. |
| vCard (.vcf) | Contact cards; each card becomes one row, with multiple emails or phones kept together. |
| NDJSON / JSON | Records, one per line or in a list. |
Leave Format on detect from file and the wizard works it out. Drag the file onto the page or choose it. Nothing is imported yet: the file is parsed into a staging area, and Parsed rows shows how many rows were read and any parse errors before you go on.
Reusable connections for pulling records from another system's API are kept on the API sources tab, for those who manage them.
Mapping: match your columns to fields
In Map columns, each file column can fill a field, become a custom field, or be skipped. The wizard pre-fills a suggestion for every column, and Suggested via says why and how sure it is (as a percentage) — check them before saving.
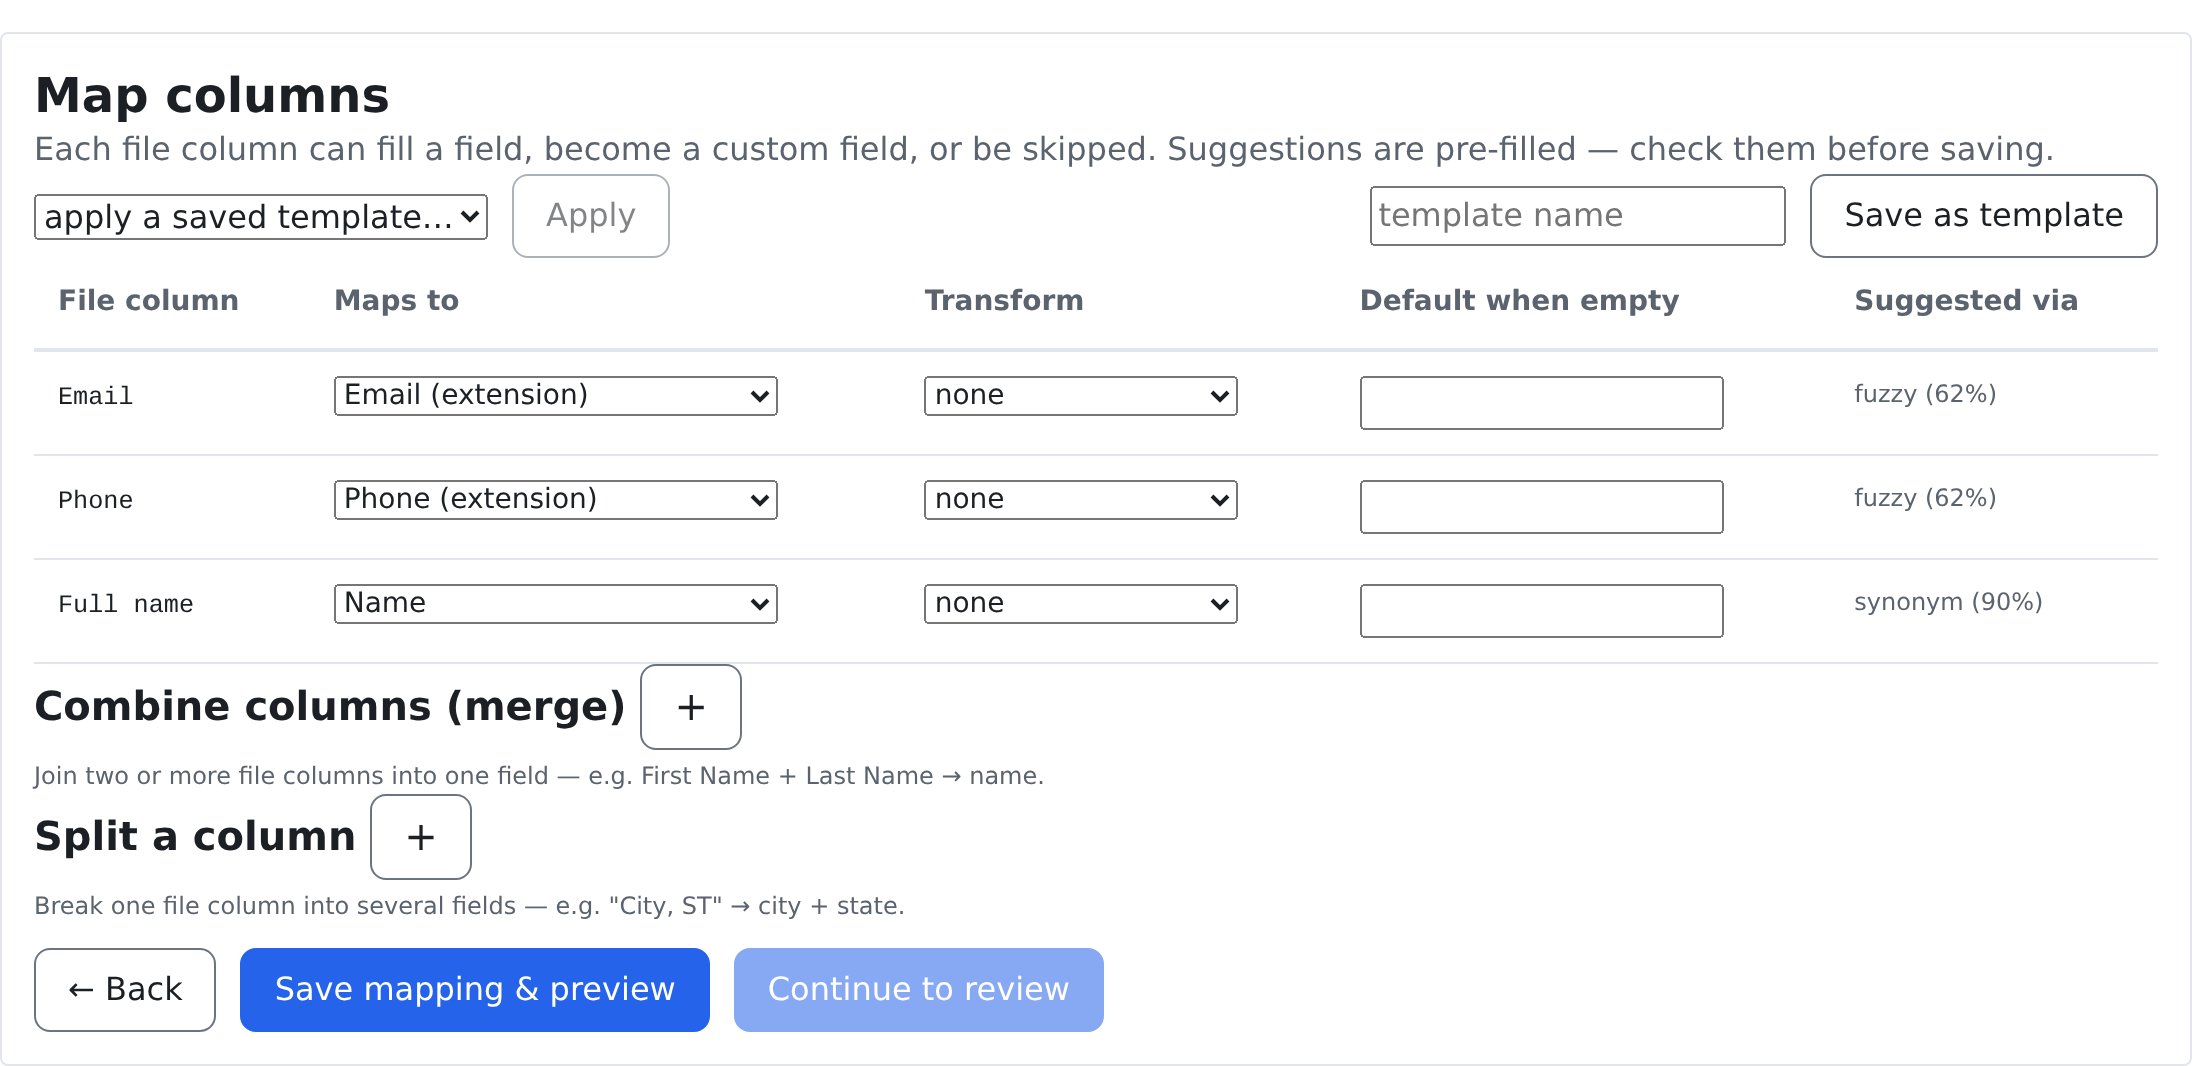
For each File column you can:
- Change what it Maps to, choose — skip —, or pick + new custom field….
- Pick a Transform, such as trimming spaces, changing case, or reading the value as a number or a date.
- Give a Default when empty.
Below the grid, Combine columns (merge) joins two or more file columns into one field (for example First Name + Last Name → name), and Split a column breaks one column into several (for example "City, ST" → city + state). Save as template keeps the mapping, and apply a saved template… pre-fills it next time; saved mappings are listed on the Mapping templates tab.
Save mapping & preview shows the mapped result with any warnings.
needs* — each is marked exists or will be created*, and nothing is created silently by the run.
Updating existing records (matching)
Imports never silently overwrite your data. By default every row inserts a new record. Under Existing-record matching (optional), pick the columns that identify a record already in the CRM (for example email) — your match key — and press Detect matches. The wizard counts the rows matched, ambiguous and new. Choose what happens When a row matches:
| Policy | What happens to a matched row |
|---|---|
| update the existing record | Update all matches: each matched record is updated with the imported values. |
| skip the row | The existing record is left untouched; the row is not imported. |
| always insert as new | The match is ignored; a new record is created anyway. |
You can override the policy row by row (This row), then Save match decisions.
Link columns to existing records (optional) does the same for a column that names another record (for example a company name): Resolve links finds the record for each value, you decide what happens when none or several are found, and Save link choices.
fails: keep going (row is marked failed), or stop and roll back this run**.
Watching and resuming a job
Import runs in the background — you can leave the page and come back. The My imports tab lists every job with its Status, its rows (imported / failed / total) and when it was created. Filter by status, or tick Only mine.
- Resume a job you loaded but have not finished.
- Watch the counts of imported, skipped and failed rows while it runs.
- Open a finished job to see the Failed rows and the error for each.
- Re-run a job after fixing the cause.
- Roll back a run: records it created are removed and records it updated are restored to their previous values.
- Delete a job: its staged rows are discarded, but records already imported stay — roll back first to undo them.
When a run finishes you get a notification (see Notifications) telling you how many rows were added and how many failed.
Exporting
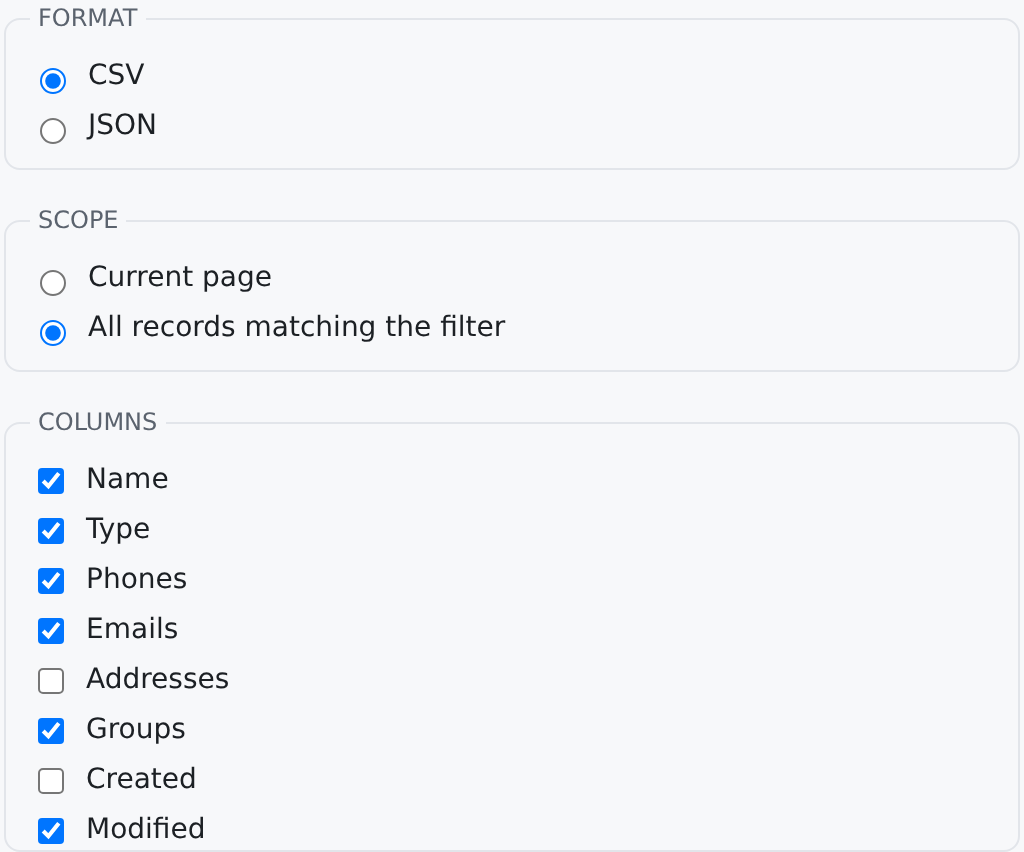
Open any list and press Export in the toolbar (visible only with export permission). In the export dialog you choose:
- Format — CSV or JSON.
- Scope — the Current page, or All records matching the filter.
- Columns — tick exactly what you need, including columns marked (export only) that are hidden in the table view.
first — otherwise the file contains the old values. Very large exports may be capped by your
plan's export limit; narrow the filter if you hit it.
Where to find it
| Screen | Where it lives | What it is for |
|---|---|---|
Import — /admin/import | Settings → System → Import | the import wizard and your own import jobs |
Who can do this
| To do this | You need |
|---|---|
| Open the Import page; create, resume and delete import jobs | import.job.manage |
| Save and reuse mapping templates | import.mapping_template.manage |
| Manage API sources (you will be asked for your password) | import.source_template.manage |
Which tables the wizard offers depends on the per-table import permissions you hold (for contacts, crm.contacts.import).
If a field you are importing into is required but your file does not supply it, the gap is tracked on Required Data — an import can be named there as the source that is going to bring the missing values.